| |
VideoDistort shows the O2 system's ability to combine digital media
and texture mapping to create interactive effects. It is very similar
to the original Distort demo, except the media is no longer a static
image. It's either live video or a movie file.
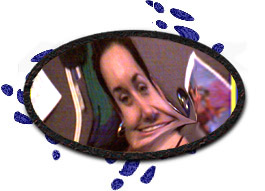
VideoDistort takes the selected media input and texture maps the
real-time video on a 3D mesh that the user can deform in various ways:
- Rubber mode: Use the left mouse button to click and drag
parts of the video points to deform the video surface. Release the
mouse button and the point will spring back into place. While in this
mode, the user can select the "Nail Rubber Points" option to keep the
deformed points from springing back. This option is located in the
"Options" menu.
- Ripple mode: Use the left mouse button to add ripples to the video as if you dropped a rock on the surface of a lake.
Media Selection
The Media selection buttons select the video input sources. If you
have a problem with a video input source, you may want to verify that
the source is properly connected. Try running the video control
panel application (vcp) and run the "Live Video In" program.
The "Default" option allows you to use whatever video source is set as
the Default Input source on the Video Panel. If the default input
changes on the Video Panel while VideoDistort is running, the change
will not be reflected in until you click on the "Default" toggle
button again.
When playing back a movie file, the default movie selection is
"/usr/share/data/movies/somersault.movie". This is from the
dmedia_eoe.data.movies subsystem. Use the "Select Movie File" option
from the "File" menu to choose a different movie. Any movie file
that can be played back with movieplayer should work.
Texture Interpolation
The "Texture Interpolation" option in the "Options" menu toggles bi-linear
interpolation on the textures on and off. Interpolation makes
texture maps look much smoother when the object they are mapped to is
much larger or smaller than the image source. One side-effect of this
is that movies that are zoomed up using texture mapping look much
better than movies that are played back using normal image zooming
(pixel doubling). Try playing back a small movie file and resizing
VideoDistort window very large. Toggle on and off interpolation mode
and notice that zoomed images look very "blocky" without interpolation.
Problems?
VideoDistort requires at least one video path to be free for any of
the live video options to work. You may not be able to run other
video applications at the same time as VideoDistort. For example,
mediaRecorder requires 2 streams of video, so make sure that you close
mediaRecorder before running VideoDistort.
How does it work?
This demo shows an application that takes advantage of the Unified
Memory Architecture in the O2 system. In conventional systems, texture mapping
involves copying the image data from main memory into special texture
mapping memory. This is a slow and inefficient process.
In the O2 system, main memory can be used for texture map memory. Instead of
copying image data from main, or video memory into texture memory, the
O2 system lets all of the subsystems reference the same parts of memory (in
this case, the video and graphics subsystems, or the movie
decompression and graphics subsystems). This architecture is more
efficient than conventional systems, and frees up the CPU to do other
computation. In the case of VideoDistort, this extra computational
power is to compute the mass-spring relationships that cause the
rubber stretching effects.
VideoDistort uses a combination of Silicon Graphics programming
interfaces (API's). The video library (VL) is used to perform live video
capture into memory. If a movie file is the input source, then the Movie
Library (movielib) is used to read and decompress the movie. JPEG movies are
decompressed using the hardware engine in the O2 system through a combination
of the movie library and the image compression (DMIC) library. OpenGL,
and a few Silicon Graphics extensions to OpenGL are used to perform the texture
mapping and graphics rendering. Finally, a new feature of the digital
media libraries called DMBuffers is used to perform all of the memory
management and data sharing between all of these API's.
VideoDistort uses a small utility library called libdmu which
simplifies some of the common programming tasks associated with
combining digital media and graphics programming.
One application of this technology is in the entertainment industry,
for real-time video effects during live coverage of sports or media
events. Other applications may include non-linear editing
applications, where texturing can be used in previewing 3D
transitions, or medical imaging, where texture mapping can perform
image warping and manipulations on the live data feeds.
|
|